
How to Get Alerted When Products Go on Sale With an External Tool
An easy way to set up deal alerts with Visualping


Cover Photo by freestocks on Unsplash
Let’s admit it. How many times have we missed out on some awesome offers on our favourite products simply because we were unaware of them? I personally have struggled with this and wished there was an app that tracks when items go on sale.
That was all in the past. With this new tool I’ve discovered, all it takes is a few steps for you to set up a deal tracker with Visualping! Best of all, you can get started for free!
Let’s see a short tutorial on how to set things up.
How Will This Work?
I will be using two products from eBay to demonstrate the power of Visualping. The products are Samsung Galaxy S10 and Huawei Honor Band 5.
The Galaxy S10 is a product that is already on sale, while the Honor Band is a product that is not on sale at the time of writing.
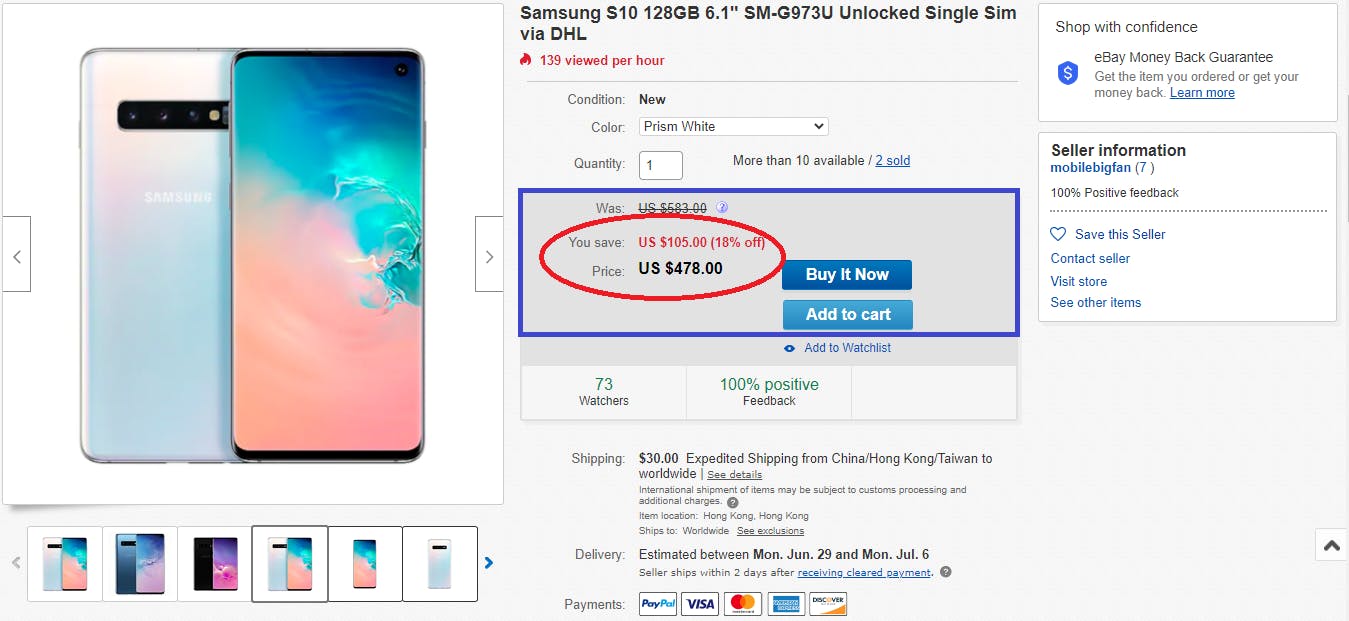 Galaxy S10 — Screenshot by Author
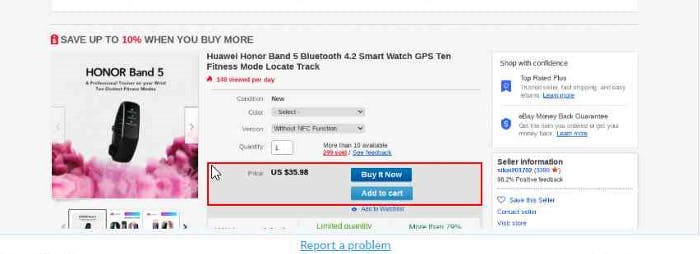
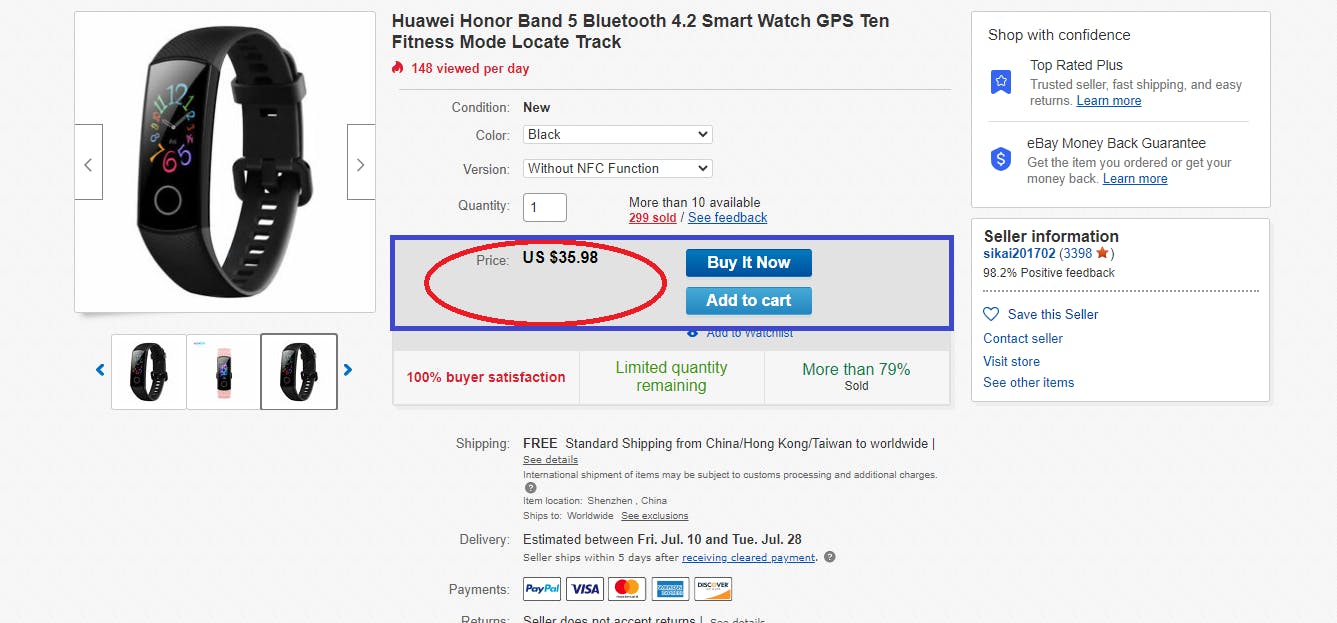 Huawei Honor Band 5 — Screenshot by Author
As you can see from the above two screenshots, we will be monitoring for any changes in the blue boxes rather than looking out for the whole page. This would make our alerts more accurate.
Why Choose a tool like Visualping?
Some websites provide you with in-built features to alert you when there is any price drop with a particular product. But not all of them work all the time. For example, eBay provides you with a “watch” feature, yet users complain that they did not receive any updates regarding price drops. You can refer to them here and here.
Another case would be where the website has no such in-built feature. But rest assured, with a monitoring tool like Visualping, you are assured to be informed of any change whatsoever.
Visualping also comes with three different ways of monitoring websites for better accuracy and customization. They are Visual, Text and Element. Visual and Element comparison methods give a similar output but are different by how they work. The “Visual” method compares the pixels, while the “Element” method compares the HTML code. You can read more about these comparison methods here.
Steps
Step 1 — Visit the Visualping website
You will be welcomed with the following screen.
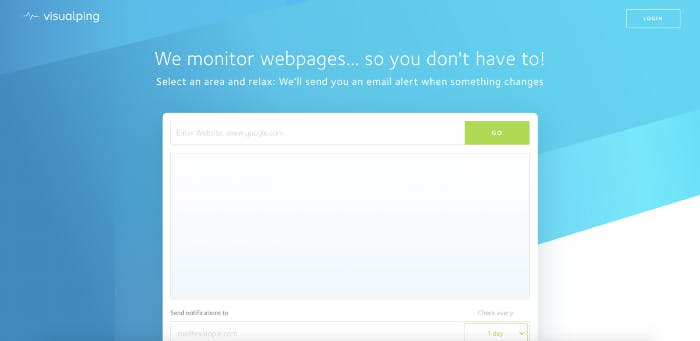 Visualping homepage — Screenshot by Author
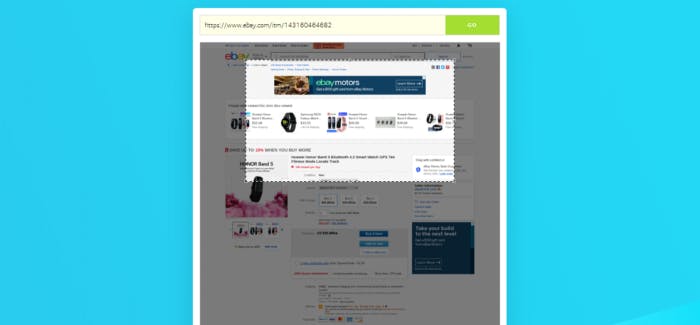
Step 2 — Enter the website you want to check for
In this step, we will be entering the web address of the product we would like to look out for. In my case, it will be of the Huawei Honor Band 5 — “ebay.com/itm/143160464682".
Once you have entered the web address, click on the “GO” button to see how your web page would look. You will get something like this. Sometimes, you might notice that the web page is quite long and keeps scrolling. This is because Visualping does not know which part you need to monitor and hence provides you with the whole web page.
 Visualping — Screenshot by Author
But in our case, this is unnecessary as we do not need to monitor the whole page.
Step 3 — Add the necessary criteria to monitor
Now let’s scroll down to the “Advanced” section. Click on the small arrow and expand it. Under “Screen”, click on “1st fold”. This would stop Visualping from loading the whole web page. Once you select “1st fold”, you might sometimes notice that the web page looks different on Visualping than what you see on eBay in your browser.
This is mainly because of the location you access eBay from. eBay customizes its pages accordingly to the user location. But don’t worry — Visualping’s got you covered. Next to the “Screen” option, you will find something called “Proxy”. This setting allows you to select from which location Visualping should access the needed website. In my case, I am from Sri Lanka, and it is located in Asia (you might want to visit Sri Lanka on your next vacation).
But it can be quite confusing when you select the proxy. You can simply click and try what proxy setting gives the web page that is most similar to your country. You can start with the “Basic” proxy option and go on to the “Country” option. Inside “Country”, try to select your country. If you cannot see your country in the list, try to select a country that is in your continent or closer to you. For me, as Sri Lanka is not available on the list, I chose China, and it gave me a similar web page to what I see on my browser window.
 GIF by Author
Step 4— Select product features
What if I am only interested in the “Blue” variant of the band? No worries! Visualping’s got your back.
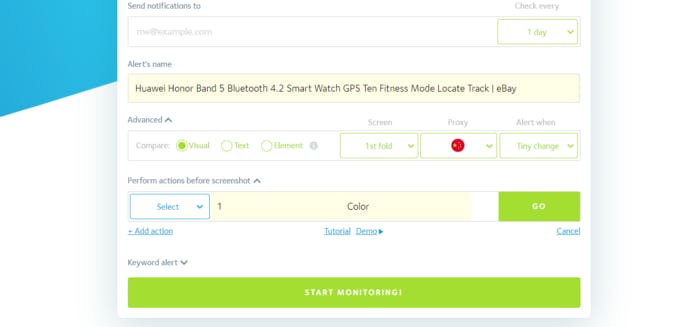
Below the “Advanced” tab, you will see a section called “Perform actions before screenshot”. With the help of this section, you can perform any actions to be completed before making the comparison. In our case, we need to select the value “Blue” from the dropdown.
Click on the Blue box, which contains “Click”, and you will see a set of actions for you to choose. Choose the “Select” option. You will now have two values to be entered. Let’s go to the product page on your browser. Go ahead and find the “Color” selection dropdown. Click on it to make sure you have products with different colours available. Now keep your mouse pointer on the dropdown and right-click on it. You will see something like this.
 Dropdown right-click — Screenshot by Author
Now click on “Inspect”. You will see a window popup from your right-hand side. This is called the “Inspector” option in your browser’s developer tools.
You will see an element being highlighted in the “Inspect” window. If you hover over to the highlighted element, you will see the “Select” dropdown being highlighted on your web page. It will look like this.
 Final Outcome — Screenshot by Author
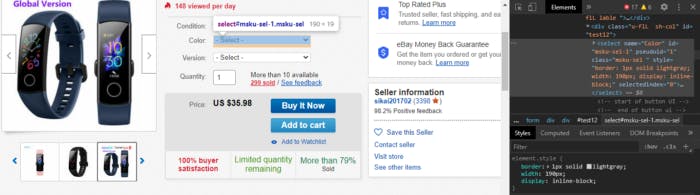
If this happens, you can know for sure that you have selected the correct element. Now, if you check the HTML element, it will start with <select ..., which is basically the select dropdown. If you carefully check the element, the select tag would have a property called “name” or “id”. If you have both, copy either one’s value and paste it into our “Dropdown name(Selector)” input in Visualping. The next step is to select the value for the dropdown. If you go back to the product web page inspect window, you will see a small arrow in front of the <select HTML tag.
Once you click on the arrow, you will see several <option> HTML tags within the <select> tag. Scroll down the options and find out the option you want to select. I want the “Blue” option, and it was the 3rd <option> tag under the <select> tag. When searching for the option, make sure you look out for the text that is between the opening and closing option tags. These tags will look similar to this <option ....> and </option>. This is how my “Blue” option tag looked like.
<option id="msku-opt-1" value="1" style="color: black;">Blue</option>
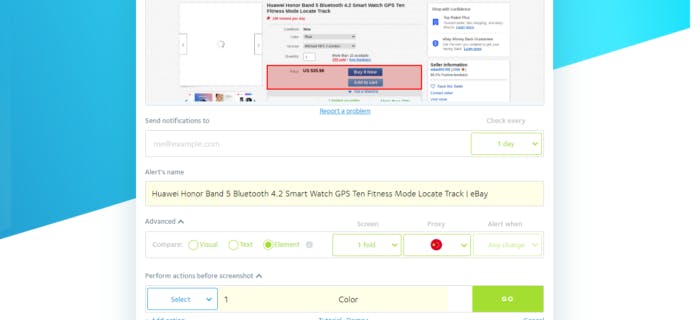
Now we know what option we should choose. All that’s left is to tell Visualping which option you want to pick. Go back to Visualping and enter the value of the option tag in the “Selection name(value)” input and click on “GO”. Make sure you enter the value property. As you can see above, the value of my selection “Blue” is 1.
 Visualping window settings after Step 4 — Screenshot by Author
Step 5— Select a comparison method
In the “Advanced” tab, you will find the three different comparison methods under “Compare”. They are Visual, Text and Element, respectively.
For my purpose, I will select the “Element” compare method as I need to monitor the blue box area of my web page(refer to screenshots of products).
Once I click the “Element” option, I should now select which HTML element I need to monitor. If you hover over the website preview, you will be able to see red rectangles appearing. These are your elements. Scroll over the price area such that you receive a rectangle covering the blue box I wanted. Keep the mouse pointer at that position and press to select the box. You can refer to the below image to find out where to exactly position your mouse pointer.
 Screenshot by Author
If everything was successful, your Visualping preview would show the selected option in the screenshot.
 Visualping window after Step 5 — Screenshot by Author
Step 6—Type your email address and select the frequency of checks
The change notification alerts will be sent to the email address of your choice. If this is the first time you use the system, it will create an account for you. You will need to click on a link sent to your email to verify the address is yours, and it will then ask you for a password.
You can also select how frequent you want the checks to be. For starters, you can get up to 2 page-checks per day for free !!!
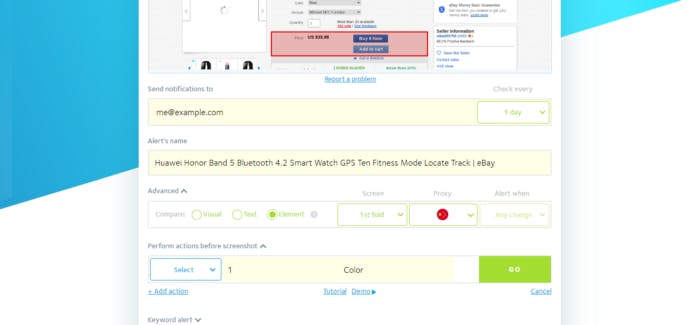 Visualping window at the end of step 6 — Screenshot by Author
Congratulations! You have now set up everything we need.
Click on the “Start Monitoring” button to get sale alerts whenever there is a change in price or an offer via email. You can further customize the way you get notified via your dashboard. Further customizations allow webhooks, RSS feeds, and even Slack integrations.
Happy shopping!!!